XR enabled me to renovate my home!
- 10 minutes read - 1957 words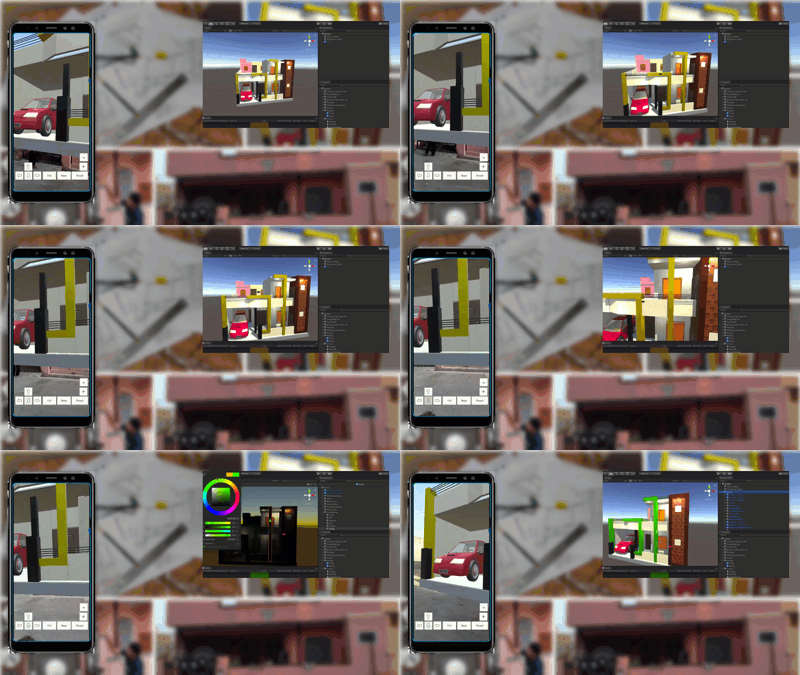
Covid19 is still unmeasurable, and we are more or less getting adjusted to this new normal. We are eagerly waiting to say goodbye to this year 2020 and welcome the coming year of hope, 2021. Read more here to know why I call this year 2020, as the year of change.
In April this year, I explained XR development from home, and that was still near shore to office, I was less than an hour away from the office. The year 2020 wanted more changes and two months ago, we decided to take a break from the hustle-bustle metro life, and move to my native place, Raisinghnagar, a small peaceful town in Rajasthan, India. Here, covid19 cases are almost nil and we feel safer here. Above all, we got a chance to stay with family after more than 2 decades (after my schooling days).
The changes continued, I took this opportunity to bring other positive changes and started following small-town life, early rise, walking, cycling near the canal, yoga, spending time in the farms, and celebrating with family. Kids are enjoying the most.

All this, I am doing with regular working from home, keeping in touch with fellow ThoughtWorkers, and my Mentees from PeriFerry. Surprisingly, I am getting very good internet speed here, and never faced any issue due to the internet. I have also hosted few webinars from here.
Good, but how is the XR helping…
Ok, let me come to the point — We moved to this town around 25 years ago, and my parents are keeping up the house we built at that time. Now, the building is asking for a good makeover, any change is not easy to accept, it required me to convince my parents about the change and bear with the inconvenience caused by renovation. XR tech has made my life easy when they saw a to-be house in XR, and I got “Let’s do it”. Once we accept the change, it is easy to travel further on the path. As I explained in my earlier article that, this 2020 will be remembered for life, no matter what, then why not remember it for a positive change.
(See video demo at the end of this article)
The Need
By now, you may have understood the need for renovation, and that is not just because of the old construct but also it required changes for car parking, separate passage for tenants on the upper floor, etc. I took charge to design the home on weekends and continue to uncover more potential of mine, read about uncovering human potentials in Covid19 time. I realized the following challenges with my initial paper/picture based designs.
-
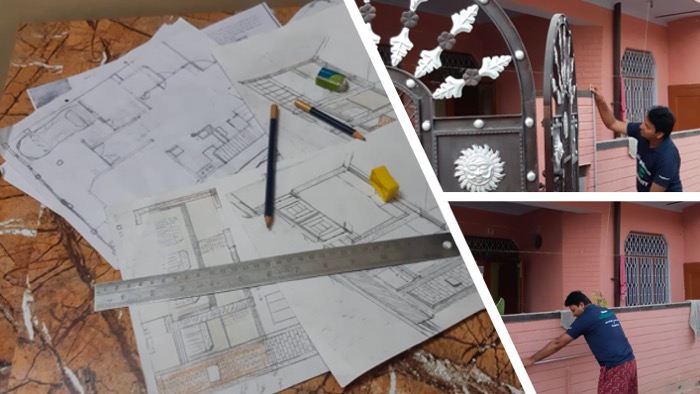
Actual scale design — We measured the house and I borrowed a pencil and paper sheet from my son, and drawn few designs with my engineering skills in ortho and isometric views, also created some 3D designs on paper, I love all this.
-
Hard to change in the drawing — This is what I hate, re-draw for every change, and the eraser also spoils the drawings. When I added color to the drawing, it added another complexity, and change becomes impossible on the same drawing. It is hard to show the same drawing of different colors.
-
Sharable multiple options — We need multiple options with color, style, and measurements that can be share easily. Digital options are good for this, for example sharing pictures on WhatsApp or by other means is quite popular.
-
Visualize beyond imagination — We need a medium to visualize the To-Be state easily, need pictures of the house from multiple angles, and multiple locations. Ideally, I want to let viewers go into the To-Be state and feel it. Rather than see things only after completion.
-
Safety and Security — Renovation and structural changes are risky, any change that causes an imbalance in structure could be fatal immediately, near term, or in long term. It needs a close review from experts and got few options rejected due to too many changes, unsafe or too costly.
After designing on papers and utilizing all the drawing sheets of my kid, I realized the issue with the approach I took, every time there was a change expected and I need to tell mason and parents to assume things to avoid making changes in the design. I was losing flexibility to change, and not reaching to my satisfaction. See the next section on How XR helped me in coming out of this dilemma.
XR solution
I utilized XR tech to solve some of the above challenges, here are the steps I have taken so far.
3D Modeling
I think paper drawings were good to keep measurements at real scale, the next step I took to design the house in 3D. 3D modeling is a basic step for XR solution. There are a number of free/commercial tools for 3D design available like Blender, 3ds Max, Maya, CAD, etc. Even there are some concepts that can directly convert designs into 3D models. I was not comfortable in any of these and went ahead with my own skills, used plain Unity 3D objects to create a 3D model of To-Be house at the real scale. It wasn’t as difficult as I was thinking. We can also get a few good models for buildings such as doors, windows, vehicles, kitchen from the Unity Asset Store.
If you haven’t yet gone through Unity 3D, find this easy article by my colleague Neelarghya.
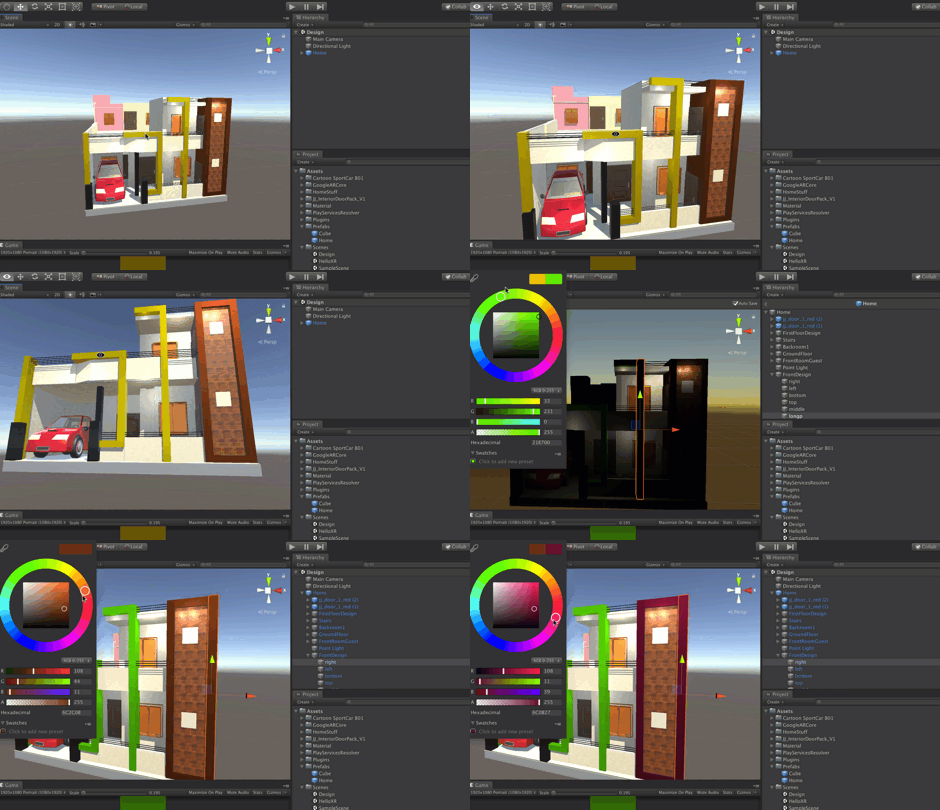
Just the 3D model would solve many things, we can try different structures without complete rebuilding, try different options with colors, tiles, etc. Take as many snapshots as you want from a different angle and share it. Not just that we can try different lighting conditions, day and night, and add some lights to see the impact. The 3D design tool allows the designer/developer to get inside the building and see from inside, and snapshot and share.
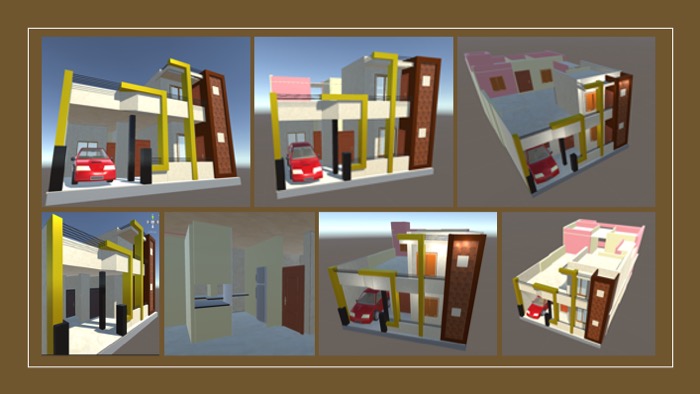
You may say it is just 3D modeling, where is the XR here?
The 3D model is more of static designs with few animations, the only easy way to share these designs is via pictures or videos. 3D model walk-thru needs knowledge of the editor, and I had to show it to on my laptop every time anyone wants to see it, and that’s not a scalable solution. Also, it is not immersive and doesn’t give a feel. That’s where the next part comes in to fill the gap.
Building XR App to Visualize 3D model
Once we have a 3D model, we can visualize it in AR or VR devices and can roam around and inside it. You can watch the AR-based car customization demo in the following article.
Such a concept can be built using ARCore + Unity or similar alternatives.
Follow the below steps to build an easy visualization using Unity for the AR capable smartphones/tablets.
[Note: — This is done in Unity 2018, but it is recommended to use Unity AR Foundation with the latest version, please go ahead and explore that]
-
Setup Project for ARCore — follow the google guidelines, and import the ARCore SDK package into Unity.
-
Remove the main camera, light, and the add prefabs “ARCore Device” and “Environment Light” available in ARCore SDK.
-
Make a prefab out of the 3D model created in the last step for the home.
-
Create an InputManager class that instantiates the home prefab at the touch on the phone screen, and attaches it to an empty game object.
public class InputManager : MonoBehaviour { [SerializeField] private Camera camera; [SerializeField] private GameObject homePrefab; private GameObject home; private Vector3 offset = new Vector3(0, -10, 10); private bool initialized = false; void Update() { Touch touch; if (!initialized) { if (Input.touchCount > 0 && (touch = Input.GetTouch(0)).phase == TouchPhase.Began) { CreateHome(touch.position); } else if (Input.GetMouseButtonDown(0)) { CreateHome(Input.mousePosition); } } } void CreateHome(Vector2 position) { Vector3 positionToPlace = offset; home = Instantiate(homePrefab, positionToPlace, Quaternion.identity); initialized = true; } } -
You can test it directly on an Android Phone (ARCore compatible). Connect the phone via USB, and test it with ARCore Instant preview. It needs some extra services running on the device. Alternatively, you can just build and run the project for android, and it will install the app to the device, and you can play with your XR app.
-
I have not included plate detection features into it, but you may include it to make it more real. The house may appear on the detected plane.
-
Since we need to run the app in outdoor, ARCore doesn’t work perfectly work outdoor, we need to do more optimization in the code to make it work, for now, I have added manual control to move the 3D model at our convenience.
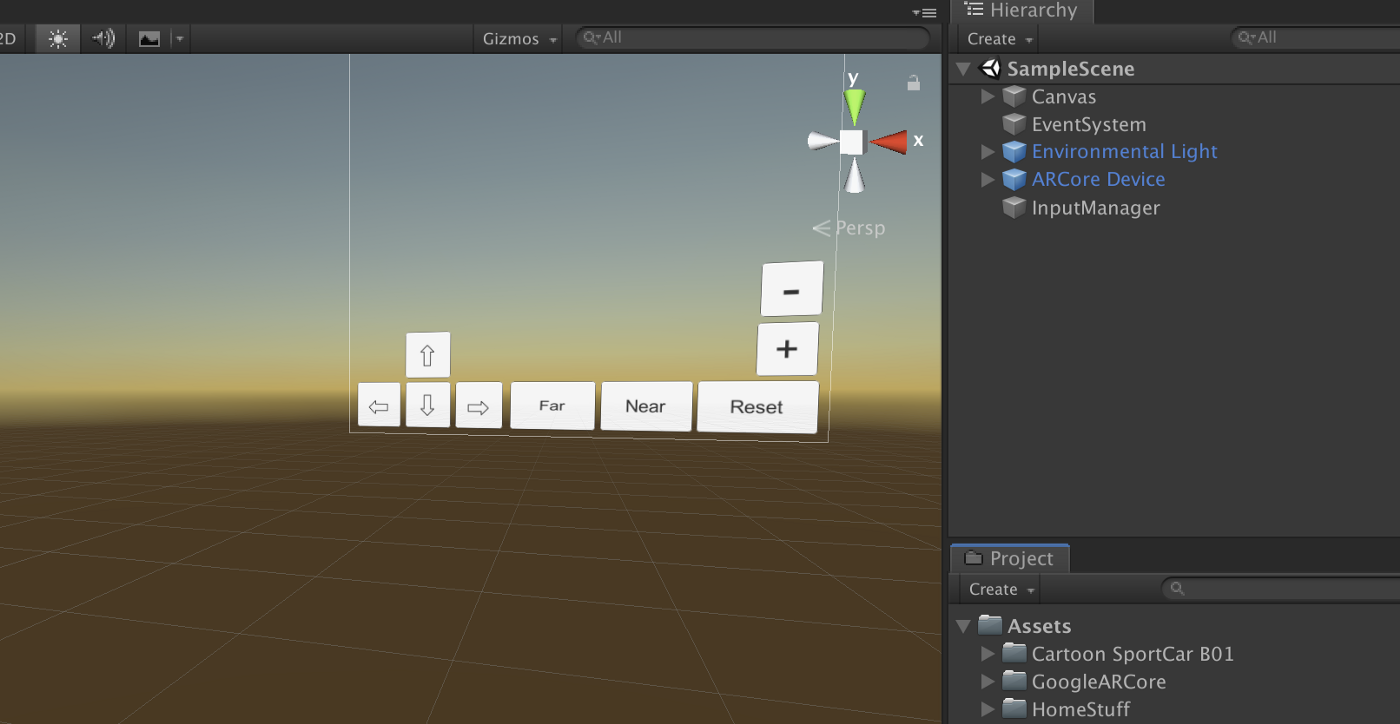
Add the following code in the input manager
[SerializeField] private Button leftButton;
[SerializeField] private Button rightButton;
[SerializeField] private Button upButton;
[SerializeField] private Button downButton;
[SerializeField] private Button forwardButton;
[SerializeField] private Button backButton;
[SerializeField] private Button resetButton;
[SerializeField] private Button zoomInButton;
[SerializeField] private Button zoomOutButton;
private float step = 1;
private float zoomStep = 0.1f;
private float minZoom = 0.3f;
private void Start()
{
  leftButton.onClick.AddListener(() => OnClickedButton(new Vector3(-step, 0, 0)));
  rightButton.onClick.AddListener(() => OnClickedButton(new Vector3(step, 0, 0)));
  upButton.onClick.AddListener(() => OnClickedButton(new Vector3(0, step, 0)));
  downButton.onClick.AddListener(() => OnClickedButton(new Vector3(0, -step, 0)));
  forwardButton.onClick.AddListener(() => OnClickedButton(new Vector3(0, 0, step)));
  backButton.onClick.AddListener(() => OnClickedButton(new Vector3(0, 0, -step)));
  resetButton.onClick.AddListener(OnClickedReset);
  zoomInButton.onClick.AddListener(() => OnClickedZoom(zoomStep));
  zoomOutButton.onClick.AddListener(() => OnClickedZoom(-zoomStep));
}
private void OnClickedButton(Vector3 position)
{
  if (initialized)
  {
    home.transform.position = home.transform.position + position;
  }
}

private void OnClickedReset()
{
  if (initialized)
  {
    home.transform.position =  offset;
  }
}

private void OnClickedZoom(float scale)
{
  if (initialized)
  {
    Vector3 currentValue = home.transform.localScale;
    if (currentValue.x + scale > minZoom && currentValue.y + scale > minZoom && currentValue.z + scale > minZoom)
    {
      home.transform.localScale = new Vector3(currentValue.x + scale, currentValue.y + scale, currentValue.z + scale);
      //home.transform.position  =  offset;
    }
  }
}
This completes the code. You may find source code here
Experience the To Be home in XR
Run the app on your phone device, when trying outdoor, some of the the effects do not work well, use the given control to manually move left, right, top, down, near, and far. We can try using zoom-in and zoom-out control to scale it to real. You can get inside the model either by moving toward the model holding phone there or just use the control to bring the home closer such that we get inside the home.
Here is a video demo.
I showcased it to parents, wife, and kids, they experienced the To-Be home they are now more than interested in “Let’s do it” than earlier confusion.
Conclusion
I have shared my quick experiment of XR that could save a lot of paper and time and money, and still achieve better agility in designing the home. This experiment is just a concept, it needs a lot of optimization to take it to production quality, and need alternative interactions to deal with tech limitations.
The following cases can enhance the use case much better
- Structural change simulation — Design each 3D parts with right weights as a rigid body, and load the BIM (Building Information Models) with gravity. Then try to change the structure and see the impact like pressure changes on beams and remaining structures. This would give a clear assessment of safety after the changes.
- Show actual size scale in 3d itself, as this still does not eliminate the need for paper design.
- Automatic scan the older structure and create a 3D model that can be changed later.
- Add tools for style customizations — color, lights, tiles, etc.
- Build a platform to include any 3D model.
More suggestions are welcome.
This article is originally published at Medium
#xr #thoughtworks #motivational #technology #ar #vr #mr #work from home #covid19 #change