Enterprise XR - Multi-Factor Authentication
- 5 minutes read - 951 wordsXR use cases are growing with advancements in the devices, internet and development technologies. There is an ever-growing demand to build enterprise use cases using ARVR technology. Most enterprise use cases eventually require integration with an enterprise ecosystem such as IAM (Identity and Access Management), ERP, CRM, and single sign-on with other systems.
Most organizations protect digital assets with a single sign-on using Multiple Factor Authentication (MFA). The MFA is generally a web-browser based authentication where the browser redirects to tenant’s authentication page where the user provides their credentials and then the user confirms another factor (PIN, OTP, SMS or mobile notifications), once it succeeds, it gets redirected back to the protected resource. The users generally trust the organization’s AD page to provide credentials. So it is important to include this web-based flow in the XR app development.
This series of posts covers end to end flow for building XR application integrated with the organization’s web-based authentication flow.
Setup Active Directory
This section describes the AD setup on Microsoft Azure. A similar setup is available on other active directories. Here are the steps you need to follow to configure AD for a mobile app.
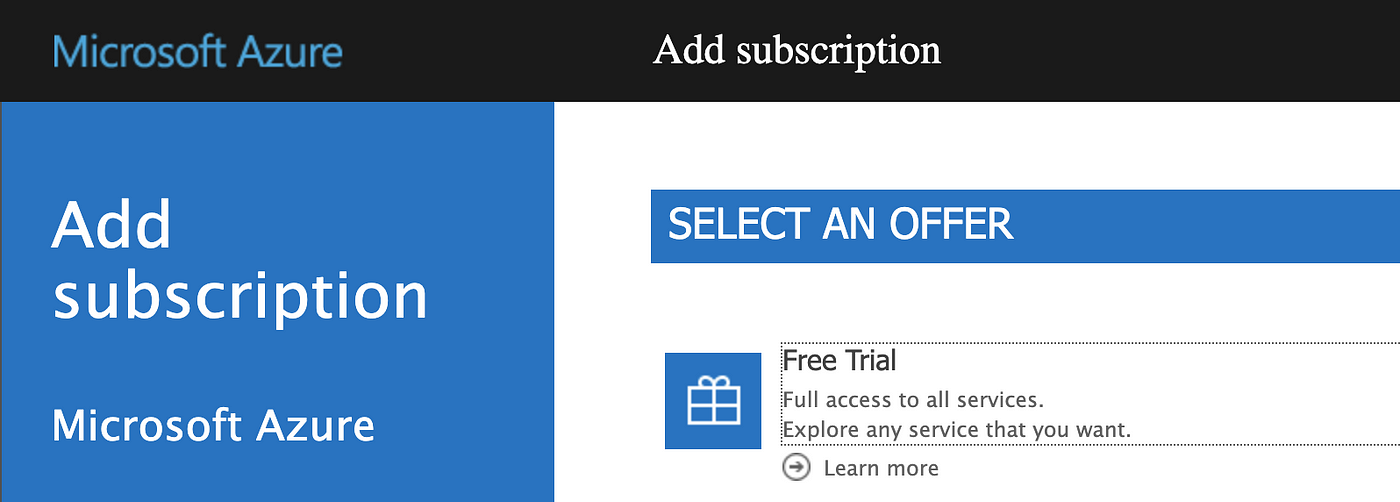
- Open Azure Portal with valid credentials, please signup if you don’t have that, https://portal.azure.com (currently there is 28 days free subscription to try out, go and “Add subscription” choose Free Trial)

- Search for Azure Active Directory

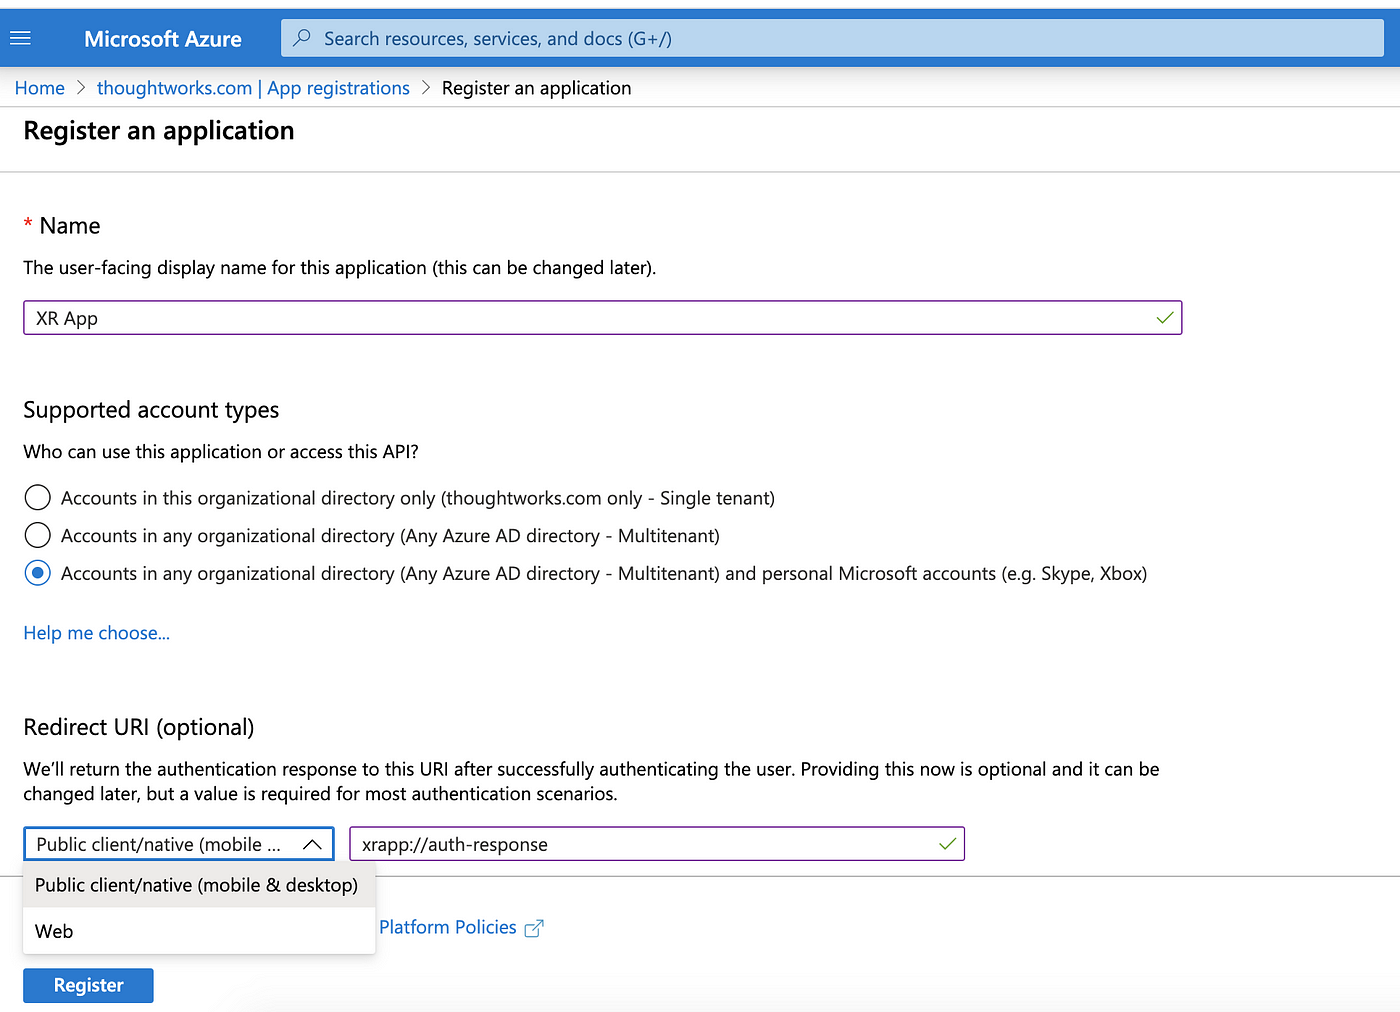
- Go to App Registration > New Registration — Fill in the details for a new app.

- Note down the client id and other parameters.

Ref [4] in references for more details.
Build an Android App integrated with Organization AD
There are multiple ways to integrate and build an android app that can communicate with an organization’s AD for authentication. There are proprietary libraries (from Google, Microsoft, Facebook etc.) that can be included in the project and you can directly communicate with respective AD, but it is helpful when Basic Authentication is enabled. Below steps cover OAuth 2 type MFA and web-browser based flow for authentication, it doesn’t require any specific library dependency.
Android Project Setup
Build your first app if you haven’t build any yet — https://developer.android.com/training/basics/firstapp Understand the MainActivity and Android Manifest file.
Open Web View In Android App
Open authorization URL in a web-view. For the above Azure AD configuration following is the authorization URL. Ref [1]
https://login.microsoftonline.com/common/oauth2/v2.0/authorize?client_id=86501f6d-0498-40ab-b3c9-81ab8ffef1ac&scope=openid&response_type=code
Refer to the code below to open a web-view at the start of the main-activity.
public class MainActivity extends AppCompatActivity {
    private static final String TAG = "MainActivity";
    //xrapp://auth-response
    private final String REDIRECT_URL_SCHEME = "xrapp";
    private final String REDIRECT_URL_HOST = "auth-response";
    private final String AD_AUTH_URL = "https://login.microsoftonline.com/common/oauth2/v2.0/authorize?client_id=86501f6d-0498-40ab-b3c9-81ab8ffef1ac&scope=openid&response_type=code";
    private WebView myWebView;
    @Override
    protected void onCreate(Bundle savedInstanceState) {
        super.onCreate(savedInstanceState);
        myWebView = new WebView(this);
        WebSettings settings = myWebView.getSettings();
        settings.setJavaScriptEnabled(true);
        settings.setDomStorageEnabled(true);
        setContentView(myWebView);
        myWebView.loadUrl(AD_AUTH_URL);
    }
}
The android-manifest looks like this. Make sure you have the Internet permission
<manifest xmlns:android="http://schemas.android.com/apk/res/android"
    package="package.userauthenticator">
    <uses-permission android:name="android.permission.INTERNET" />
    <application
        android:allowBackup="true"
        android:icon="@mipmap/ic_launcher"
        android:label="@string/app_name"
        android:roundIcon="@mipmap/ic_launcher_round"
        android:supportsRtl="true"
        android:theme="@style/AppTheme">
       <activity android:name=".MainActivity">
            <intent-filter>
                <action android:name="android.intent.action.MAIN" />
                <category android:name="android.intent.category.LAUNCHER" />
            </intent-filter>
        </activity>
    </application>
</manifest>
Intercept the Redirect URL
While configuring AD, we have provided a redirect URL — xrapp://auth-response. Clicking on “Continue” in the last step will redirect to “xrapp://auth-response?code=<value of code>”
The android app needs to intercept this URL to read code parameter from it. Following code checks for any URL loading and see if any URL starts with xrapp://auth-response and then fetch code from it.
...
myWebView = new WebView(this);
myWebView.setWebViewClient(new WebViewClient() {
    public boolean shouldOverrideUrlLoading(WebView view, String url) {
        Uri uri = Uri.parse(url);
        if (REDIRECT_URL_SCHEME.equalsIgnoreCase(uri.getScheme()) && REDIRECT_URL_HOST.equalsIgnoreCase(uri.getHost())) {
            String code = uri.getQueryParameter("code");
            return true;
        }
        view.loadUrl(url);
        return true;
    }
});
...
Fetch the access token
In the last step, we read the authorization code, lets now fetch an access-token from AD. Here is the URL to fetch the token for above AD setup https://login.microsoftonline.com/common/oauth2/v2.0/token Ref[2]
Add an Async Task to fetch a token once the Authentication code is fetched.
...
AsyncTask<String, Void, String> getToken = new GetTokenAsyncTask();
getToken.execute(code);
return true;
...
Here is the GetTokenAsyncTask
private class GetTokenAsyncTask extends AsyncTask<String, Void, String> {
    @Override
    protected String doInBackground(String... strings) {
        String code = strings[0];
        HashMap<String, String> postParams = new HashMap<>();
        postParams.put("client_id", CLIENT_ID);
        postParams.put("grant_type", "authorization_code");
        postParams.put("code", code);
        return performPostCall(AD_TOKEN_URL, postParams);
    }
    protected void onPostExecute(String response) {
       super.onPostExecute(response);
       String access_token = getValueFromJSONString(response,  "access_token");
       finish();
  }
}
Fetch the User Profile Using the Access token
Once the access token is fetched, get the user profile data. Microsoft has graph APIs to fetch the profile data Ref [3] eg. https://graph.microsoft.com/beta/me/profile/ It would return whole JSON data for the profile.
...
String access_token = getValueFromJSONString(response, "access_token");
result = new GetProfileAsyncTask().execute(access_token).get();
...
The GetProfileAsyncTask fetches the profile data in the background.
private class GetProfileAsyncTask extends AsyncTask<String, Void, String> {
    @Override
    protected String doInBackground(String... strings) {
        String access_token = strings[0];
        return performGetCall(GET_PROFILE_URL, access_token);
    }
}
Show the Username from the profile
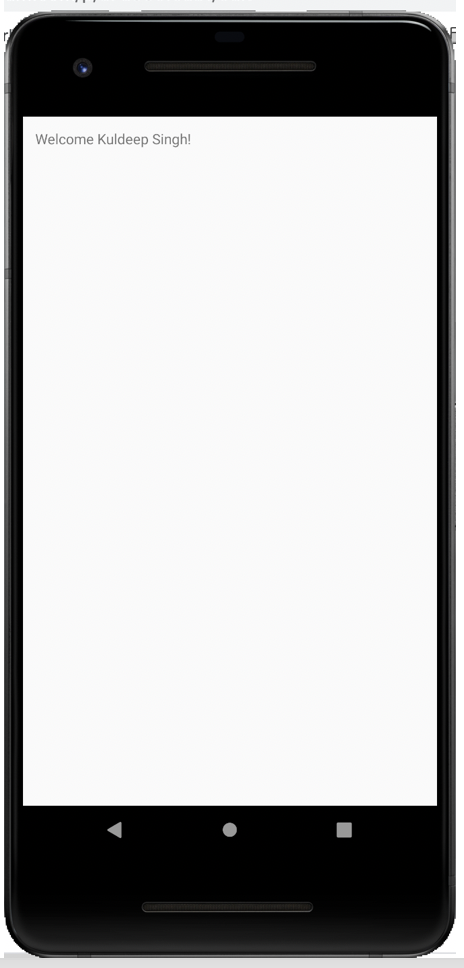
Let’s show the user name from the profile data. For this, we may create another intent to display the text and call the intent after getting the user name from the response. Don’t forget to add intent in the android manifest file.
...
result = new GetProfileAsyncTask().execute(access_token).get();
String displayName = getValueFromJSONString(result, "displayName");
displayName = "Welcome " + displayName + "!";
Intent intent = new Intent(MainActivity.this, DisplayResponseActivity.class);
intent.putExtra("response", displayName);
startActivity(intent);
finish();
...

Conclusion
This article describes the end to end steps to configure an app on Active Directory and build an integrated android app without any proprietary dependencies. In the next few articles, we will discuss how to handle interoperability and build integrate ARVR app. Next » Enterprise XR — Interoperability Source code can be found at https://github.com/thinkuldeep/xr-user-authentication/tree/part1
This article was original published on XR Practices Publication
References :
- Oauth2 Authorization EndPoint
- OAuth2 Token End Point
- Using Microsoft Graph APIs
- https://docs.microsoft.com/en-us/azure/app-service/configure-authentication-provider-aad#register