OS Customization for XR Device
- 8 minutes read - 1631 wordsThe Operating System of XR (AR VR) devices is mostly customized to the hardware of the device, and not just that the OS level customizations are needed to meet the enterprise needs such as integration with Enterprise MDM (Mobile Device Management) solutions (such as Intune, MobileIron and Airwatch), 3D lock screen, idle-timeout, custom home screen, custom settings, security, as so on.
Most organizations currently using traditional hardware and software assets such as mobile devices, laptops, and desktops, and the processes and policies for managing these devices are quite stable and straightforward by now. Now the expectation is to follow the same/similar process for managing the organization’s XR devices. Most enterprise MDM supports standard OS (Windows, Mac, Linux, and Android), but mostly these are not well aligned to 3D user experience.
There are a number of XR devices based on Android, eg Oculus,Google Glass, Vuzix, and ARCore/VR supported Smart Phones. This article is a first step toward building a custom Android OS and small customizations. We will use the Android Open Source Project (AOSP) to build the custom image as per our needs.
 Take a deep breath, this will be a lengthy task, you need to wait for hours and hours to finish the steps, and plan your time ahead.
Let’s start …
Before you start
Wait, before you start. It needs 230GB plus free disk space, and a decent Linux based environment. I was able to get a spare Mac Book Pro with 230 GB available space, I thought of setting the environment following the guide building-android-o-with-a-mac.
But later, I found that after basic build software installations and IDE setup, space available is less than 220 GB. Luckily I was in touch with an Android expert Ashish Pathak, he suggested not to take a risk and find other PC.
And here we go, found a Windows 10 PC with 380GB free space.
Let’s first set up a Linux environment from scratch. Remember Virtual Box etc are not the option here, let’s not complicate things.
Ok, let’s start now…
Setup a Linux based Development Environment
Follow the steps below to set up a Linux environment from scratch on a Windows PC.
-
Free up the memory space — Open Disk Manager and choose the Shrink disk/delete an unused drive, and let space comes as unallocated, no need to format it, while installation the unallocated space will be formatted as per the Linux OS.
-
Download Ubuntu Desktop OS Image — https://releases.ubuntu.com/16.04/
-
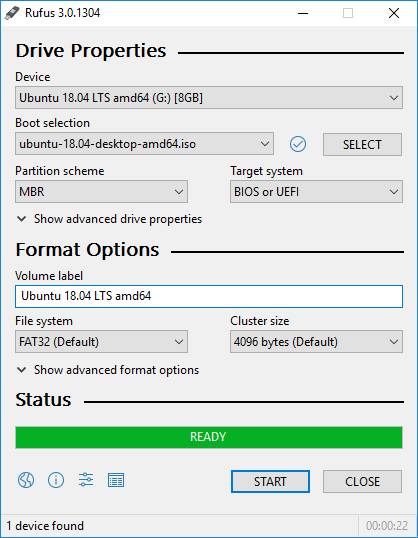
Create a Bootable image — Download Rufus from https://rufus.ie/, insert a USB pen drive (I used one of size 8GB), select the downloaded Ubuntu ISO image, and start creating the image bootable image.
-
It will some minutes and once you see “Ready” eject the USB safely.
-
Boot from the Pen Drive — On windows OS, choose restart, and press F9 while starting (for me it worked, try to look at what does your PC support to see boot menu), it will show a boot menu, choose the pen drive option. It will start the Ubuntu installation. Go with the default options.
-
Setup Ubuntu — During installation, it will reboot, and choose Ubuntu option from the boot menu, and then choose the timezone, language, and set up a user account (remember credentials please for later login). You will see the Ubuntu home screen, and see keyboard shortcuts. Remember these.
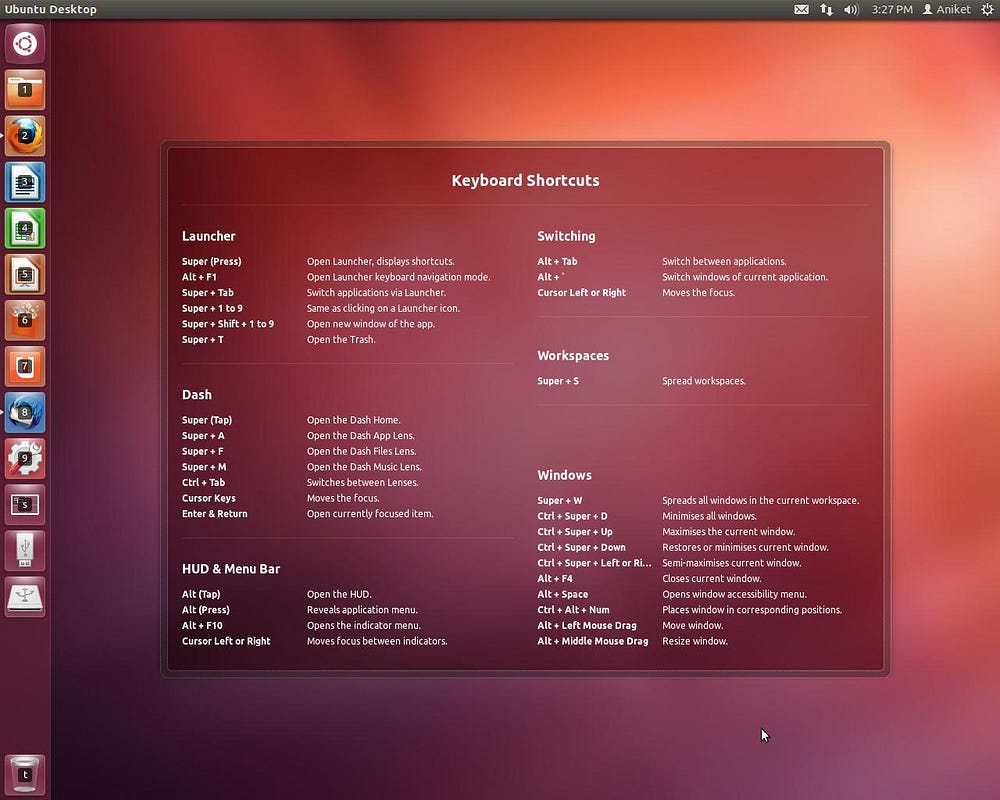
Congratulations! it’s ready now.
Setup Android Build Environment
Follow the below steps to set up a build environment for AOSP. Detailed steps are here
- Install Git — https://git-scm.com/downloads — Linux version
- Install Repo Tool — https://gerrit.googlesource.com/git-repo/+/refs/heads/master/README.md
$ sudo apt-get install repo - Install Java 8 —
$ sudo apt-get install openjdk-8-jdk - Create a working directory
arvr@arvr-pc:/$ cd ~
arvr@arvr-pc:~$ mkdir aosp
arvr@arvr-pc:~$ cd aosp
arvr@arvr-pc:~/aosp$
Download AOSP Source Code
- Initialize the AOSP repository source code (the default is master): I fetched from the android-8.1.0_r18 branch to build for my old Android device, You may want to go for the latest.
arvr@arvr-pc:~/aosp$ repo init -u https://android.googlesource.com/platform/manifest -b android-8.1.0_r18 --depth=1 - You need to set the correct username and email in git config, to make the above succeed.
git config --global user.name "FIRST_NAME LAST_NAME" git config --global user.email "MY_NAME@example.com" - Sync the Repo
It takes a couple of hours to complete, I let it run in the night, with caffeine ON.
arvr@arvr-pc:~/aosp$ repo sync -cdj16 --no-tags
...
...
Checking out files: 100% (9633/9633), done.
Checking out files: 100% (777/777), done.tform/system/coreChecking out files:  23% (181/777)
Checking out files: 100% (34/34), done.latform/test/vts-testcase/performanceChecking out files:  32% (11/34)
Checking out projects: 100% (592/592), done.
repo sync has finished successfully.
arvr@arvr-pc:~/aosp$
Parallel to this, I have also started downloading Android Studio, with SDK, emulators or so. — Follow the steps
Good night!
Build the source code
Good morning, source code is downloaded, the Android Studio is also ready.
Let’s do another big chunk, building the source code
-
Set the environment
arvr@arvr-pc:~/aosp$ source build/envsetup.sh including device/asus/fugu/vendorsetup.sh including device/generic/car/vendorsetup.sh including device/generic/mini-emulator-arm64/vendorsetup.sh including device/generic/mini-emulator-armv7-a-neon/vendorsetup.sh including device/generic/mini-emulator-mips64/vendorsetup.sh including device/generic/mini-emulator-mips/vendorsetup.sh including device/generic/mini-emulator-x86_64/vendorsetup.sh including device/generic/mini-emulator-x86/vendorsetup.sh including device/generic/uml/vendorsetup.sh including device/google/dragon/vendorsetup.sh including device/google/marlin/vendorsetup.sh including device/google/muskie/vendorsetup.sh including device/google/taimen/vendorsetup.sh including device/huawei/angler/vendorsetup.sh including device/lge/bullhead/vendorsetup.sh including device/linaro/hikey/vendorsetup.sh including sdk/bash_completion/adb.bash -
Now lunch command is available for you, pass an x86 target to it, arm ones are quite slow. lunch command without any parameter lists the options, choose one of them.
arvr@arvr-pc:~/aosp$ lunch You're building on Linux Lunch menu... pick a combo: 1. aosp_arm-eng 2. aosp_arm64-eng 3. aosp_mips-eng 4. aosp_mips64-eng 5. aosp_x86-eng 6. aosp_x86_64-eng 7. full_fugu-userdebug arvr@arvr-pc:~/aosp$ lunch 5 ============================================ PLATFORM_VERSION_CODENAME=REL PLATFORM_VERSION=8.1.0 TARGET_PRODUCT=aosp_x86 TARGET_BUILD_VARIANT=eng TARGET_BUILD_TYPE=release TARGET_PLATFORM_VERSION=OPM1 TARGET_BUILD_APPS= ... OUT_DIR=out AUX_OS_VARIANT_LIST= ============================================ -
Run make command — “make” or “m” with parallelization 16.
 arvr@arvr-pc:~/aosp$ make -j16
 ...
 REALLY setting name!
 Warning: The kernel is still using the old partition table.
 The new table will be used at the next reboot.
 The operation has completed successfully.
 #### build completed successfully (01:43:31 (hh:mm:ss)) ####
This command took good 2 hours, and your emulator is ready now. Good noon!
-
Run the emulator
Now the emulator is ready, let’s run it.
arvr@arvr-pc:~/aosp$ emulator & [1] 11121 arvr@arvr-pc:~/aosp$ emulator: WARNING: system partition size adjusted to match image file (2562 MB > 200 MB) emulator: WARNING: cannot read adb public key file: /home/arvr/.android/adbkey.pub qemu-system-i386: -device goldfish_pstore,addr=0xff018000,size=0x10000,file=/home/arvr/aosp/out/target/product/generic_x86/data/misc/pstore/pstore.bin: Unable to open /home/arvr/aosp/out/target/product/generic_x86/data/misc/pstore/pstore.bin: No such file or directory Your emulator is out of date, please update by launching Android Studio: - Start Android Studio - Select menu "Tools > Android > SDK Manager" - Click "SDK Tools" tab - Check "Android Emulator" checkbox - Click "OK"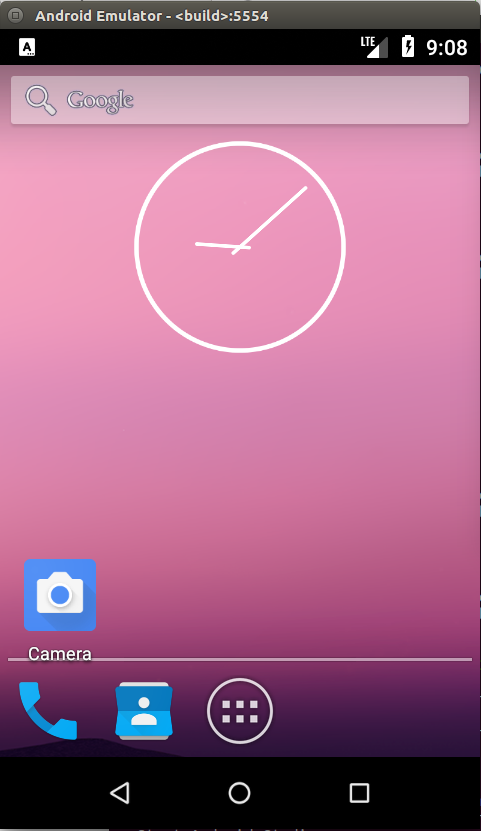 Your fresh android image is running. Congratulations. You should see it in the list of connected devices in ADB.
arvr@arvr-pc:~/aosp$ adb devices
List of devices attached
emulator-5554 device
You can install applications on this emulator just like any other.
Customizing the Settings App
Let’s assume, we want to customize the Settings app for our XR need. Let’s open the settings I wanted to customize a settings app.
Oops! the settings app is failing to load.

Logcat tied to look through the logs using logcat.
arvr@arvr-pc:~/aosp$ adb logcat
05–10 11:21:10.091 1640 1651 I ActivityManager: START u0 {act=android.intent.action.MAIN cat=[android.intent.category.LAUNCHER] flg=0x10200000 cmp=com.android.settings/.Settings (has extras)} from uid 10015
05–10 11:21:10.092 1604 2569 W audio_hw_generic: Not supplying enough data to HAL, expected position 895044 , only wrote 894994
05–10 11:21:10.126 1383 1383 D gralloc_ranchu: gralloc_alloc: Creating ashmem region of size 1540096
05–10 11:21:10.130 2782 2782 W zygote : Unexpected CPU variant for X86 using defaults: x86
05–10 11:21:10.132 1640 1759 I ActivityManager: Start proc 2782:com.android.settings/1000 for activity com.android.settings/.Settings
...
This issue may be related to the branch Android 8.1 that I checked out, I tried to rebuild “m clean” and “m” but no luck.
Good evening!
Luckily I am not the only one facing this, I found this.
Android 8 Settings app crashes on emulator with clean AOSP build stackoverflow.com
Now I got two suggestions, change WifiDisplaySettings.java in the AOSP packages or just clean build with the user-debug target. I will go with the first option.
Open the Settings App in Android Studio
Locate the settings in /packages/apps/Settings and open in Android Studio.
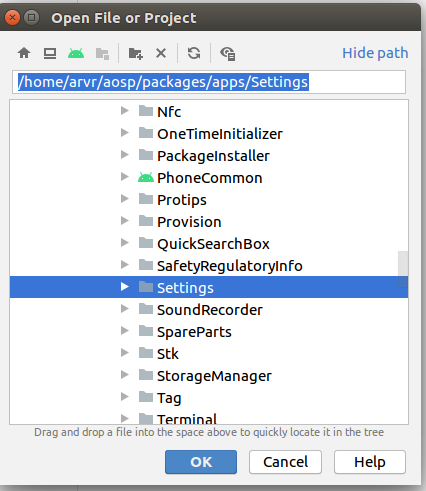
Open class - /src/com/android/settings/wfd/WifiDisplaySettings.java
and Change the code snippet
public static boolean isAvailable(Context context) {
   return context.getSystemService(Context.DISPLAY_SERVICE) !=
    null && context.getSystemService(Context.WIFI_P2P_SERVICE) != null;
}
To
public static boolean isAvailable(Context context) {
    return false;
}
Let’s build again, another few hours? No, don’t worry this time it won’t take long, it will build just what you have changed. Run the make command again.
arvr@arvr-pc:~/aosp$ m -j16
The operation has completed successfully.
[1]+ Done emulator (wd: ~/aosp)
(wd now: ~/aosp/packages/apps/Settings/src/com/android/settings/wfd)
#### build completed successfully (02:44 (mm:ss)) ####
arvr@arvr-pc:~/aosp$ emulator &
The emulator is now built with changes, run the emulator now. And here you go, Settings app is working!
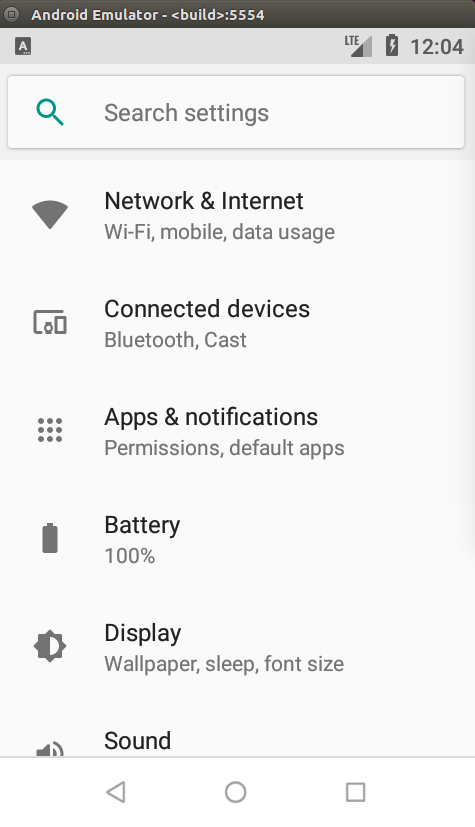
Customize the Settings App
Hay! you know, you have already customized the android image. Not excited enough, let’s do one more exercise to customize the Settings Menu options.
Open /res/values/strings.xml and change some menu titles eg. change “Battery” title to “Kuldeep Power” and “Network & Internet” to “K Network & Internet”.
<string name="power_usage_summary_title">Kuldeep Power</string>
<string name="network_dashboard_title">K Network & Internet</string>
Build the image (remember the m command) and run the emulator as described in the last step, wait for a few minutes and you have your customized android menu.
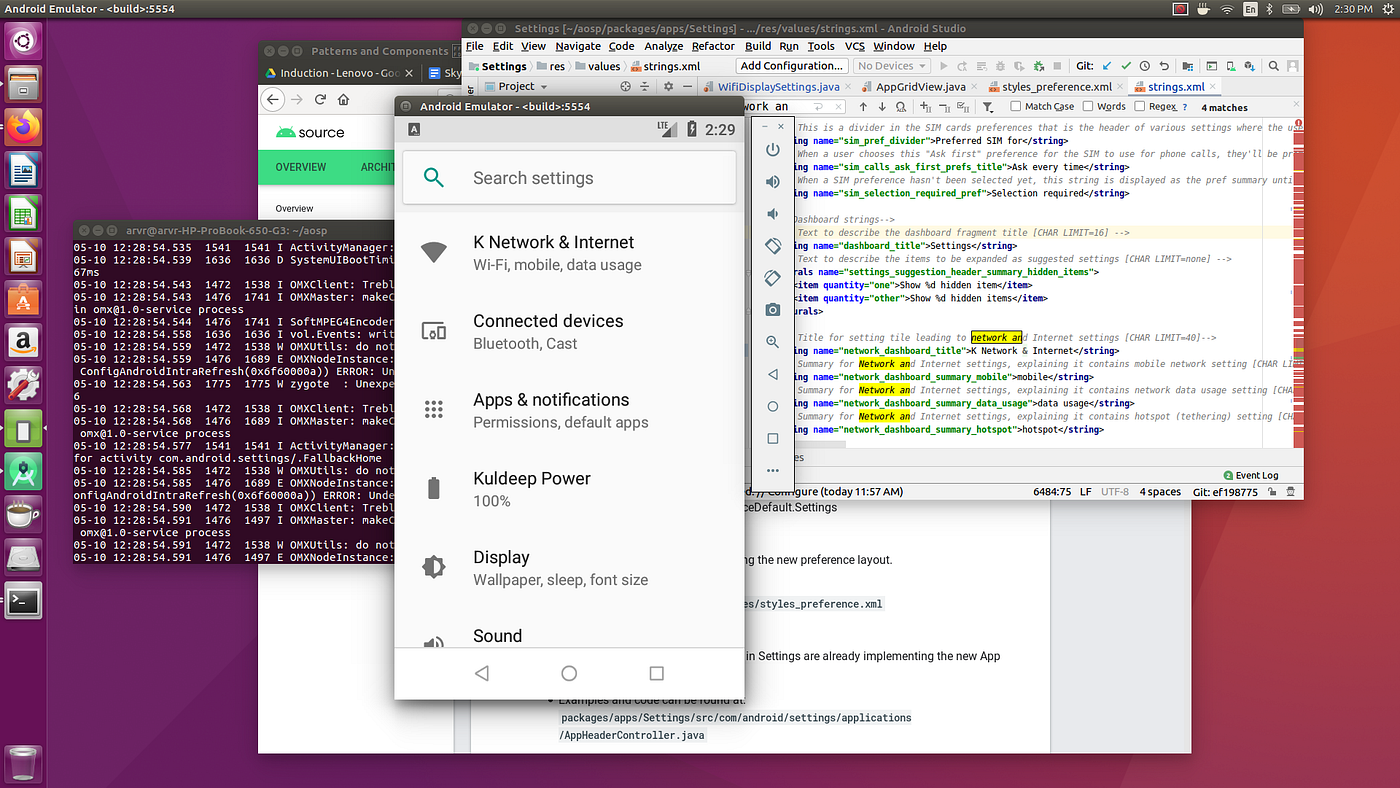
With this, your custom settings app is ready and available in the Andorid Image, and now I would like to close the article, and say you good Night.
I will write about flashing this image to a device later, the spare phone for which I am building this image, is now not working, looks like my son has experimented with that old phone.
In the future, we will also discuss how to customize native users managements in android based XR devices, and also how to handle device-specific options that are not supported in the regular phone.
Good Night, keep learning! keep sharing!
This article is original published on XR Practices Publication
#xr #customization #enterprise #android #aosp #os #technology