Getting Started with nRF Connect SDK
- 4 minutes read - 675 wordsIn the previous article, we explored setting up a Thread Network and enabling communication within and outside the network via a Border Router using OpenThread and the nRF Connect SDK. While we covered installing and configuring the SDK during the setup, we didn’t dive into the development process for nRF Connect SDK Apps. Let’s address that now!
What We’ll Cover
This article introduces the nRF Connect SDK and walks through building applications with it.
What You’ll Need
If you followed the setup instructions from Step 2 in the previous article, your development environment should already be ready. Install VS Code via the Toolchain Manager in nRF Connect for Desktop, and nRF Connect Extensions if not already did so.
Understanding nRF Connect SDK
The nRF Connect SDK is a versatile, scalable framework for developing low-power wireless applications using Nordic Semiconductor devices. It is built on the Zephyr RTOS and includes key components:
-
Zephyr: Open-source RTOS with support for small IoT devices, providing board configurations, drivers, and libraries.
-
nrf: Nordic-specific applications and connectivity protocols.
-
nrfxlib: Nordic-supplied libraries for device chipsets.
-
MCUBoot: Bootloader, sample apps, and secure firmware handling.
-
The SDK uses configuration systems like Kconfig (.conf) for modular setup and DeviceTree (.dts) for hardware configurations, making it highly adaptable for various devices.
Types of Applications
nRF Connect SDK applications are structured in following way:
- Repository Applications: Sample apps (e.g., OpenThread CLI) within the SDK source tree.
- Workspace Applications: Applications placed parallel to the SDK components in the workspace, ideal for most projects.
- Freestanding Applications: Apps outside the workspace, suitable for managing shared SDKs across multiple projects.
Building an Application
To build an application using nRF Connect SDK, let’s create a simple “Blinky” app from existing samples:
-
Set Up VS Code Ensure the nRF Connect extensions and tools are installed and configured in VS Code.

-
Copy a Sample Application From the sample apps, copy the “Blinky” app. Choose a directory for the app, and it will generate a structure with a
main.cfile and other files.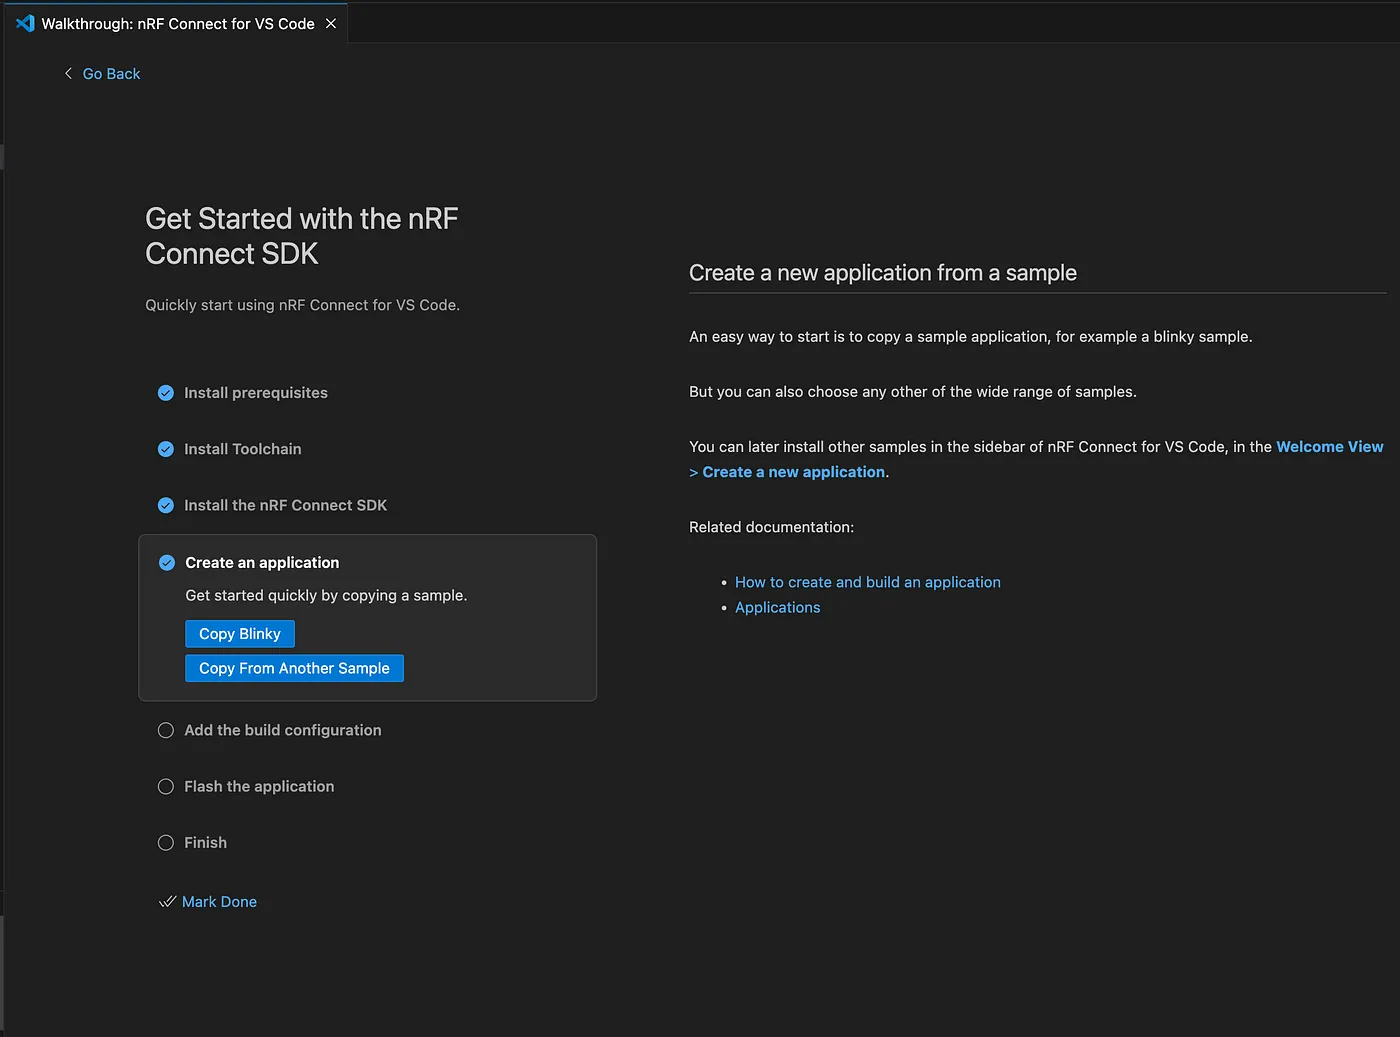
Here’s the
main.ccode of the Blinky app/* * Copyright (c) 2016 Intel Corporation * * SPDX-License-Identifier: Apache-2.0 */ #include <stdio.h> #include <zephyr/kernel.h> #include <zephyr/drivers/gpio.h> /* 1000 msec = 1 sec */ #define SLEEP_TIME_MS 1000 /* The devicetree node identifier for the "led0" alias. */ #define LED0_NODE DT_ALIAS(led0) /* * A build error on this line means your board is unsupported. * See the sample documentation for information on how to fix this. */ static const struct gpio_dt_spec led = GPIO_DT_SPEC_GET(LED0_NODE, gpios); int main(void) { int ret; bool led_state = true; if (!gpio_is_ready_dt(&led)) { return 0; } ret = gpio_pin_configure_dt(&led, GPIO_OUTPUT_ACTIVE); if (ret < 0) { return 0; } while (1) { ret = gpio_pin_toggle_dt(&led); if (ret < 0) { return 0; } led_state = !led_state; printf("LED state: %s\n", led_state ? "ON" : "OFF"); k_msleep(SLEEP_TIME_MS); } return 0; }
Configuring the Build
This is important step. In earlier article we used west command to build the Thread End Device firmware. Let’s do that with VSCode, it provides UI to configure all the build parameter.
-
Choose Board Target: For example,
nRF52840 Dongle. -
Set Configuration: Use the base configuration file (
prj.conf) from the project folder.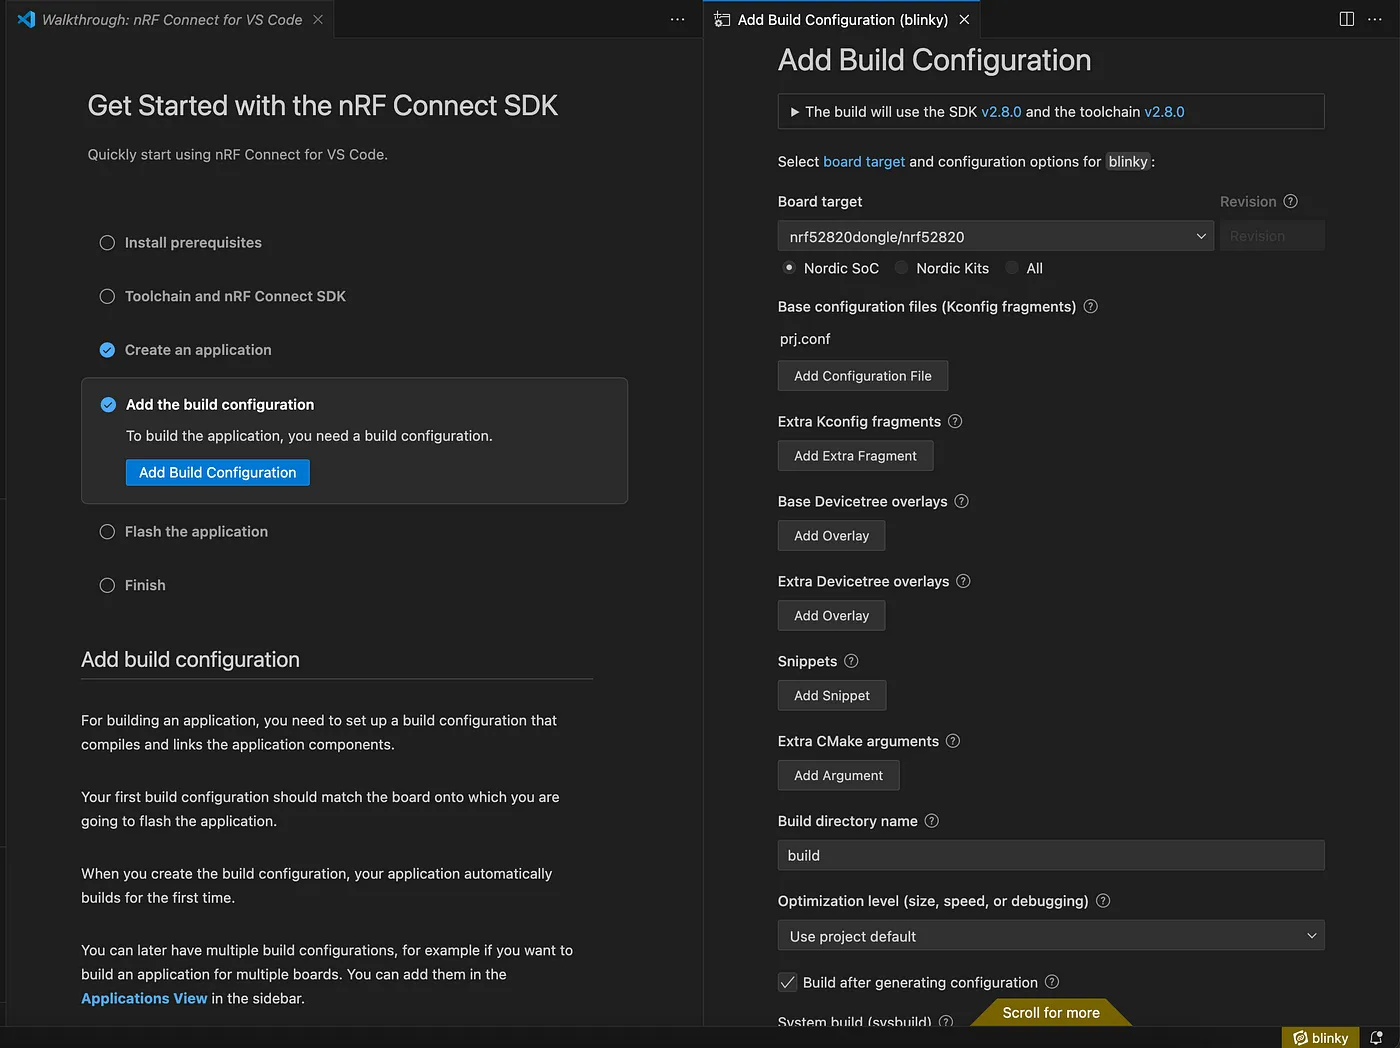
-
Build: Click “Build Configuration” in VS Code to run CMake, compile using Ninja, and generate the firmware (
merged.hex).
Flashing the Firmware
Use the Programmer App to flash the firmware to your device as described earlier. If successful, the dongle’s red LED will stop and another green LED will start blinking.
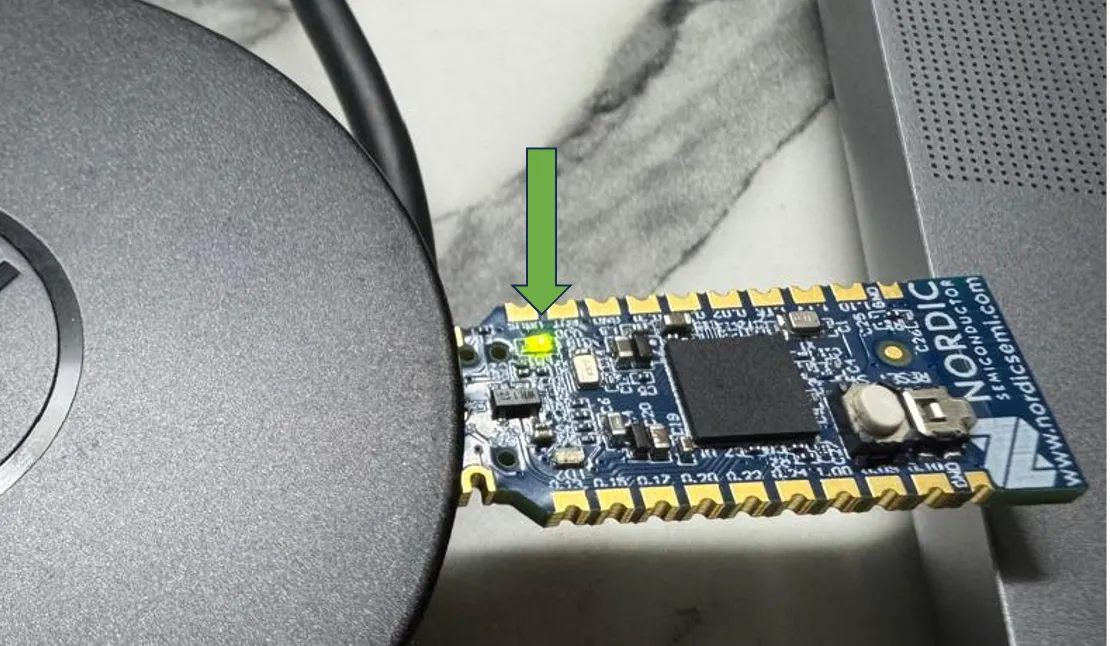
Monitoring via Serial Port
Connect your device to a serial port using screen:
screen /dev/tty.usbmodem1301 115200
or directly from VSCode.
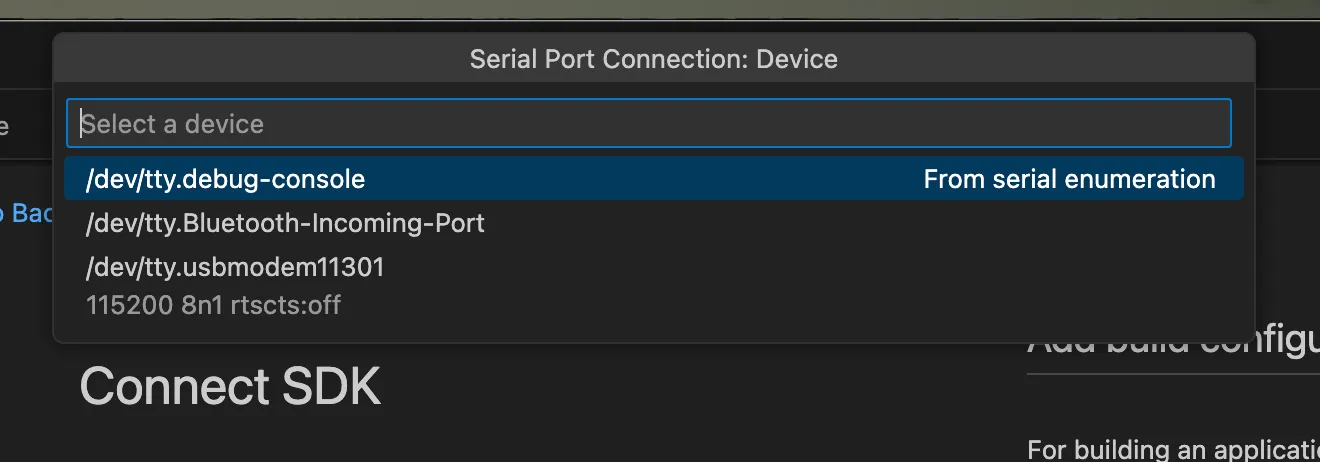
And we would see the ‘printf(“LED state: %s\n”, led_state ? “ON” : “OFF”);’ statement as per the main.c

This is simple blinky app.
What’s Next?
This basic example introduced you to the nRF Connect SDK application internals. To delve deeper, consider exploring:
Logging and debugging Multi-threading with Zephyr Real-Time Operating System (RTOS) fundamentals Check out 🔗 nRF Connect SDK Fundamentals — Nordic Developer Academy course to solidify your understanding.
Happy building! 🚀
Find the IoT Practices Publication for more details.
#IOT #network #cloud #getting started #learning #technology #fundamentals #thread #openthread #nRF #SDK