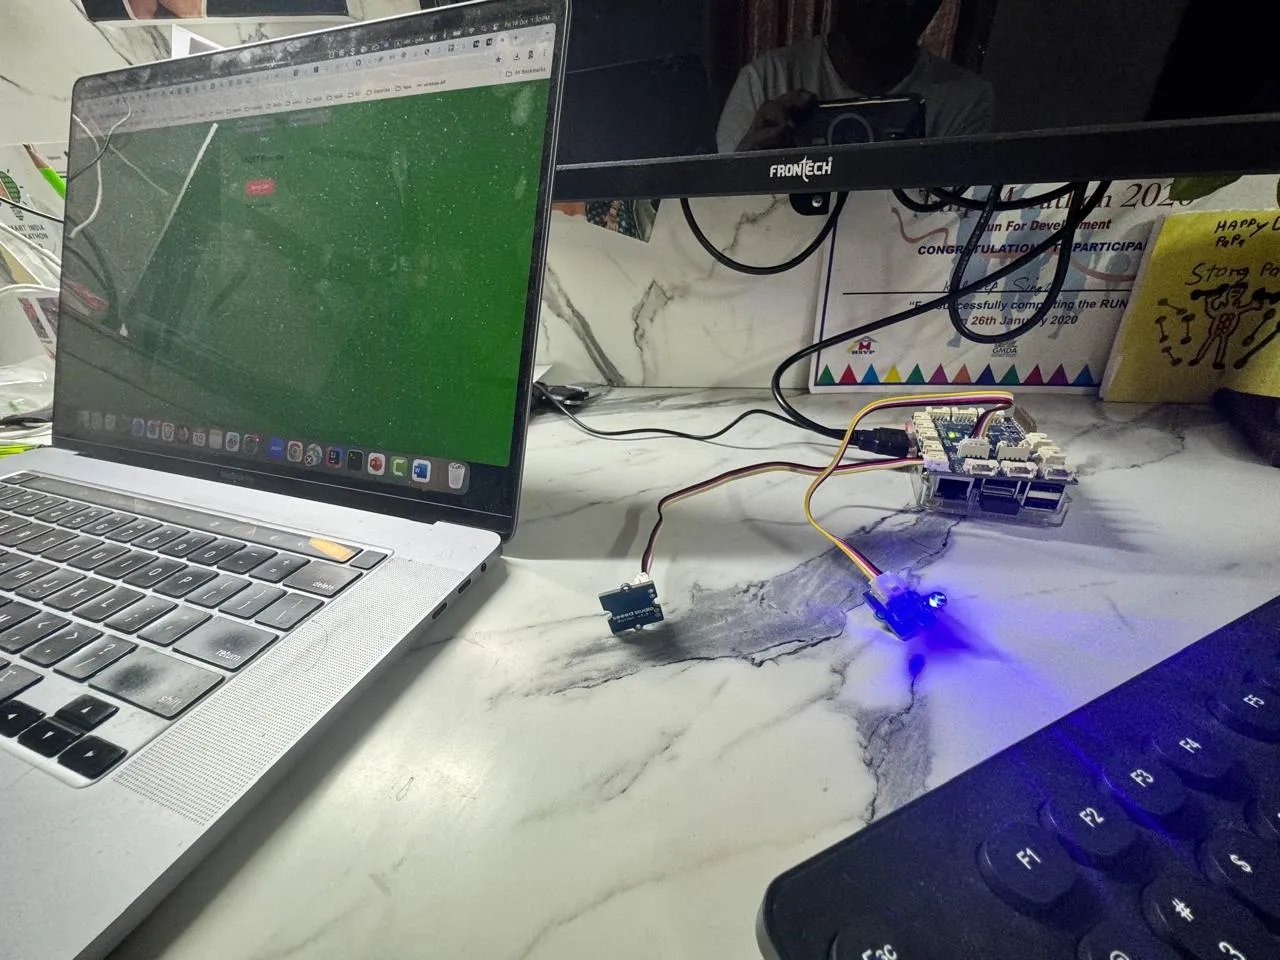
Soft IoT Continued: Bringing the Internet into IoT
- 7 minutes read - 1491 wordsSimplifying IoT learning doesn’t have to mean getting bogged down with hardware details. Instead, let’s dive into Soft IoT — where we focus on software-driven IoT exploration. In this article, we’ll learn how to read inputs from a button and turn it into a web based remote control for an LED, all while keeping things software-centric..

In the previous article, we introduced Soft IoT using a Grove Pi board, which simplifies IoT learning by hiding wiring and connections complexity. We explored how to program an LED to blink and fade.
Now, we’ll build upon that foundation by reading inputs and controlling the LED remotely over the internet.
What You’ll Need:
- Grove Pi board and Raspberry Pi (as before)
- Grove Button and Grove Led
- Universal 4-pin cables
🔘 Reading Input from a Button
Connecting the Grove button to the Pi is straightforward. With the button set up as an input, you can read its state using Python:
button = 4 #D4 Pin
grovepi.pinMode(button,"INPUT")
while True:
    try:
        print(grovepi.digitalRead(button))
        time.sleep(.5)
    except IOError:
    print ("Error")
Make sure to update Python and the GrovePi libraries v1.4 using the commands like
sudo apt-get update
/home/pi/Dexter/GrovePi/Script/update_grovepi.sh
/home/pi/Dexter/GrovePi/Firmware/firmware_update.sh
With the right firmware, you’ll see your button inputs reflected in real-time. Next, we’ll use these inputs for more interactive control.
🧑🏻💻SSH into Your Raspberry Pi
To avoid switching back and forth to the Raspberry Pi desktop, you can use SSH from your laptop (e.g., Putty for Windows). Connect using:
➜ ~ ssh pi@dex.local
pi@dex.local's password:
Last login: Thu Oct 17 19:14:09 2024
pi@dex:~
Note: — dex.local is hostname for Raspberry PI, and “pi” is username. Default password is “robots1234” (you may not find it easily on internet)
✅ Making the Button a Toggle Switch
You can easily write the input read from button to LED, and LED will light up when button is pressed state.
grovepi.digitalWrite(led, grovepi.digitalRead(button))
Want to make the button more interactive? Let’s create a program where each press toggles the LED on or off:
import time
import grovepi

led = 6 #D6
button = 4 #D4

grovepi.pinMode(led,"OUTPUT")
grovepi.pinMode(button,"INPUT")
time.sleep(1)

button_state = False

print ("Press button to switch on/off LED")

while True:
    try:
        bInput = grovepi.digitalRead(button)
        if bInput == 1 :
            #toggle the state
            button_state = not button_state
            grovepi.digitalWrite(led, button_state)
            print ("LED :",  button_state)
        time.sleep(0.2)
    except KeyboardInterrupt:   # Turn LED off before stopping
        grovepi.digitalWrite(led,0)
        break
    except IOError:             # Print "Error" if communication error encountered
        print ("Error")
Run the program and you get what you need!
pi@dex:~/Dexter/GrovePi/Software/Python $ python grove_led_button_blink.py
Press button to switch on/off LED
('LED :', True)
('LED :', False)
('LED :', True)
('LED :', False)
('LED :', True)
('LED :', False)
Thats the power of software, it can transform the hardware in a new version. Just like above grove button now become a toggle switch. We will make it more interactive with internet.
🛜 Integrating IOT with the Internet
In earlier articles of IOT Practices, we explored about MQTT protocol for IoT, and making communication over the internet. MQTT is lightweight and perfect for IoT communication.
Setting up an MQTT Broker
You need a message broker to send and receive messages. We’ll use Eclipse Mosquitto as our broker. If you’re on a Mac (else follow documentations), you can install it using:
brew install mosquitto
Start and stop using as follows
➜  ~ brew services stop mosquitto
Stopping `mosquitto`... (might take a while)
==> Successfully stopped `mosquitto` (label: homebrew.mxcl.mosquitto)
➜  ~ brew services start mosquitto
==> Successfully started `mosquitto` (label: homebrew.mxcl.mosquitto)
➜  ~
Update the Mosquitto configuration to make it accessible from other devices (like RaspberryPI):
➜  ~ ➜  ~ cd /usr/local/opt/mosquitto/etc/mosquitto
➜  mosquitto touch passwdfile
➜  mosquitto chmod 0700 passwdfile
➜  mosquitto mosquitto_passwd passwdfile thinkuldeep
Warning: File /usr/local/Cellar/mosquitto/2.0.20/etc/mosquitto/passwdfile1 has world readable permissions. Future versions will refuse to load this file.
Password:
Reenter password:
➜  mosquitto
It would add user thinkuldeep and credentials to passwdfile.
Now add these configurations in /usr/local/opt/mosquitto/etc/mosquitto/mosquitto.conf (or wherever it is located in your installation)
listener 1883 0.0.0.0
protocol mqtt
allow_anonymous true
password_file  /usr/local/opt/mosquitto/etc/mosquitto/passwdfile

log_type all
log_dest file /usr/local/opt/mosquitto/mosquitto.log
log_facility 5
Restart the mosquitto, and let it up and running and check the logs “tail -f /usr/local/opt/mosquitto/mosquitto.log”.
Setting up an MQTT Client
Next we need to setup MQTT client that can publish message to a topic and subscribe to receive message from a topic. We need to set it up on machine (Raspberry PI) from where we need to publish, and subscribe. On the Raspberry Pi, install the Paho MQTT client for Python:
sudo apt install python3-pip
pi@dex:~ $ sudo pip3 install paho-mqtt
Collecting paho-mqtt
Using cached https://www.piwheels.org/simple/paho-mqtt/paho_mqtt-1.6.1-py3-none-any.whl
Installing collected packages: paho-mqtt
Successfully installed paho-mqtt-1.6.1
Here’s a basic example to connect the Pi to the MQTT broker and send messages:
import time
import grovepi
import paho.mqtt.client as mqtt

hostname = "192.200.2.90" #IP OF MY MAC WHERE BROKER IS RUNNING
broker_port = 1883
topic = "/command"

def on_connect(client, userdata, flags, rc):
  print("Connected to MQTT broker with result code: " + str(rc))
  client.subscribe(topic)
  print("Subscribed to topic :" + topic)

def on_message(client, userdata, msg):
  command =  msg.payload.decode()
  print("Message received: " + command)

client = mqtt.Client()
client.on_connect = on_connect
client.on_message = on_message

print ("Connecting to MQTT broker")

client.username_pw_set("thinkuldeep", "mqtt") #CREDENTIALS FOR USER
client.connect(hostname, broker_port, 60)
client.loop_start()

time.sleep(1)
print("Publishing a message to " + topic)
client.publish(topic, "Hello from thinkuldeep")

while True:
  try:
    time.sleep(1)
  except KeyboardInterrupt:
      client.loop_stop()
      client.disconnect()
      break
  except IOError:             # Print "Error"
      print ("Error")
Run this program on Raspberry PI and if you get following then all is set. You are able to connect, subscribe, communicate with a broker over internet.
pi@dex:~ $ python mqtt.py
Connecting to MQTT broker
Connected to MQTT broker with result code: 0
Subscribed to topic :/command
Publishing a message to /command
Message Received:  Hello from thinkuldeep
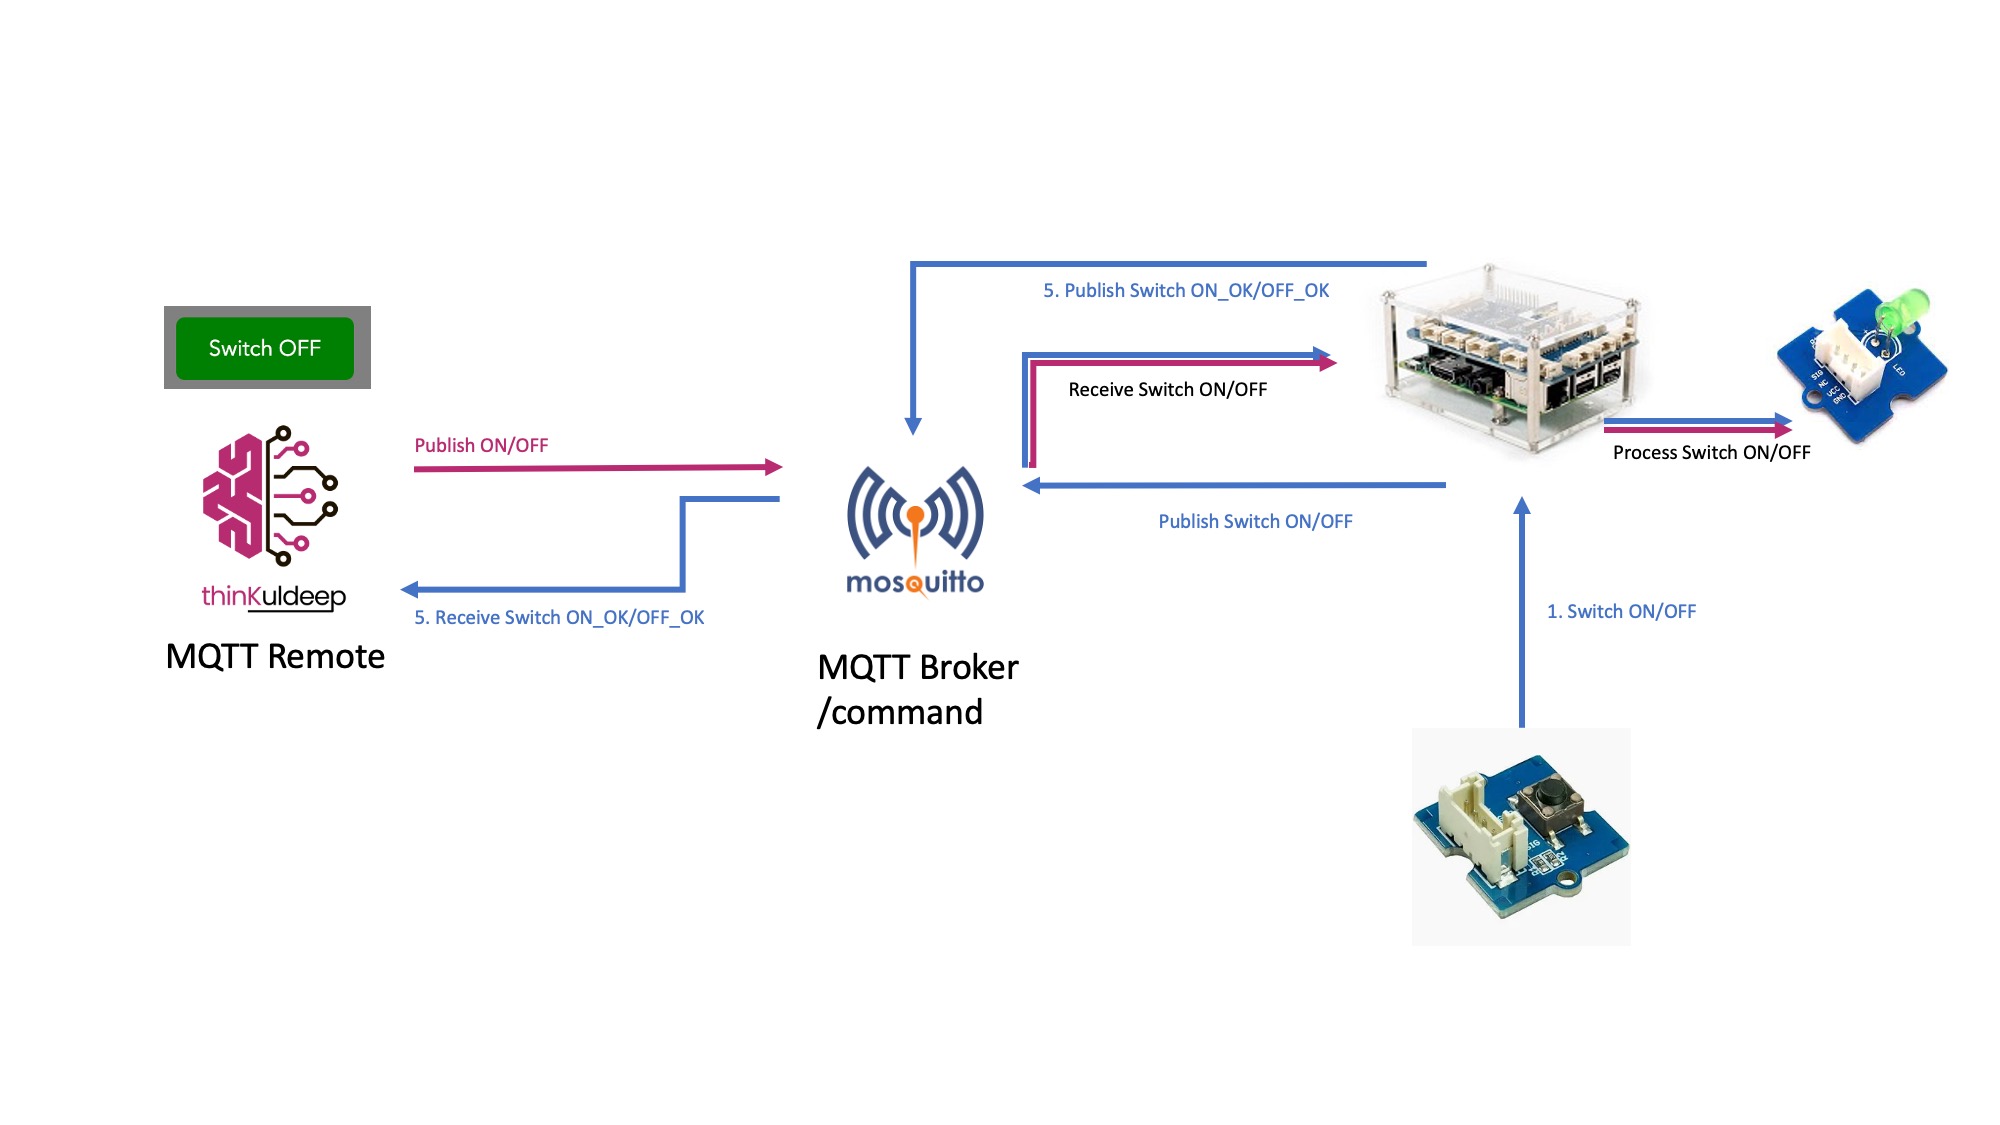
This brings internet into PI. Now let’s make it more interesting by making a web based remote control.
🖥️ Making Web Based Remote Control
Combine everything into a simple web-based remote control. We would create a soft button on web that works in sync with hardware button.

Configure MQTT as Websockets
Just add these configurations in /usr/local/opt/mosquitto/etc/mosquitto/mosquitto.conf
listener 8883
protocol websockets
socket_domain ipv4
Setup Web MQTT Client
Here’s how you can set up an MQTT client on a web page using JavaScript:
<script src="https://unpkg.com/mqtt/dist/mqtt.min.js"></script>
<script>
  console.log(mqtt)
  const client  = mqtt.connect("ws://localhost:8883/mqtt")
  const topic = "/command"
  client.on('connect', function () {
     console.log('Connected.')
     // Subscribe to a topic
     client.subscribe(topic, function (err) {
     console.log(err)
     if (!err) {
       // Publish a message to a topic
       client.publish(topic, 'ON')
      }
     })
   })

  client.on('message', function (topic, message) {
      console.log(message)
  })

  client.on('error', function (error) {
      console.log(error)
      client.end();
  })
</script>
Complete code for publishing message and receiving is available here
Integrating All Together
Let’s merge the code into a comprehensive program that uses a button press to send commands over MQTT and controls the LED remotely.
On PI side, here is example code, complete code is available at grove_led_mqtt_button.py
led = 6 #D6
button = 4 #D4

grovepi.pinMode(led,"OUTPUT")
grovepi.pinMode(button,"INPUT")
time.sleep(1)

button_state = False
hostname = "192.168.5.200" #IP of hostbame of broker.
broker_port = 1883
topic = "/command"

def on_connect(client, userdata, flags, rc):
  print("Connected to MQTT broker with result code: " + str(rc))
  client.subscribe(topic)
  print("Subscribed to topic :" + topic)

def on_message(client, userdata, msg):
  command =  msg.payload.decode()
  print("Message received: " + command)
  if command == "ON" :
      button_state = True
      grovepi.digitalWrite(led, button_state)
      client.publish(topic, "ON_OK")
  elif command == "OFF" :
      button_state = False
      grovepi.digitalWrite(led, button_state)
      client.publish(topic, "OFF_OK")

client = mqtt.Client()
client.on_connect = on_connect
client.on_message = on_message

print("Connecting to MQTT broker")

client.username_pw_set("thinkuldeep", "mdqtdt") # user credentials
client.connect(hostname, broker_port, 60)
client.loop_start()

time.sleep(1)
client.publish(topic, "OFF_OK")

print ("Press button to switch on/off LED")

while True:
  try:
    bInput = grovepi.digitalRead(button)
    if bInput == 1 :
        button_state = not button_state
        if button_state :
            client.publish(topic, "ON")
        else :
            client.publish(topic, "OFF")
    time.sleep(0.2)
    except KeyboardInterrupt:   # Turn LED off before stopping
        digitalWrite(led,0)
        client.loop_stop()
        client.disconnect()
        break
    except IOError:  # Print "Error" if communication error encountered
        print ("Error")
Note: The code presented here are just sample code, does not follow coding practices, don’t use these as it is in production.
Run it now
- Run the python script on Raspberry PI
- Open the page https://thinkuldeep.com/mqtt-remote/ or checkout https://github.com/thinkuldeep/mqtt-remote and open index.html
- Make sure of connection url and topic and click on “Setup”
- Once done, have fun!
Conclusion
By following this guide, you’ve learned how to read input from buttons, control hardware remotely, and connect your IoT devices to the internet — all using a simplified approach. This “Soft IoT” method enables rapid learning without the hurdles of complex wiring and hardware setups. Stay tuned as we explore more ways to harness the power of IoT!
Feel free to explore the complete code here and start creating your own IoT projects!
In Chapter 4 of my book 📕Exploring the Metaverse, I discuss how IoT will shape our connected future, and XR devices are the evolved IoT.

☞ Click here for availability and discounts in your region
☞ Read: Exploring the Metaverse - Synopsis
Stay tuned for more! Keep learning, keep experimenting, and keep sharing.
Find the IoT Practices Publication for more details.
#IOT #raspberry pi #rebooting #cloud #getting started #learning #technology #fundamentals